Example: Creation of a new Interview Template
In this first example we will show how to create one new template.
Due to the implications that it may have, the Templates can't be uploaded in the manager portals, and require additional Nfield Template Administrators rights for it.
One template can contain multiple files for the structure, bussines logic and appearance, this is: cshtml, js, css, png...
The main advantage that is has compared with a theme, is the possibility to add and modify the cshtml files that form the base structure.
For this example will use as a starting point the questionnaire:
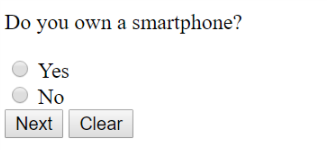
*QUESTION 10 *CODES 61L1
Do you own a smartphone?
1:Yes
2:No

*END
Which generates basic the output:
Steps
Download and extract the default template
Create a new empty directory called
MyFirstTemplateCopy the
DefaultLayout.cshtmlandInterviewTemplate.cshtmlfiles in theMyFirstTemplatefolderOpen the
InterviewTemplate.cshtmland replace the code:
@section BodyContent
{
    @this.RenderInterviewScreen()
}
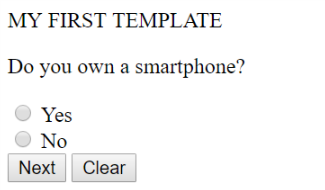
with:
@section BodyContent
{
    <span>MY FIRST TEMPLATE</span>

    @this.RenderInterviewScreen()
}
Compress both files into
MyFirstTemplate.zip(just directly into the zip, no with subfolders)Upload the Template into your domain
Update the questionnaire script and add a reference in the first line to the template:
*TEMPLATE "MyFirstTemplate"

*QUESTION 10 *CODES 61L1
Do you own a smartphone?
1:Yes
2:No

*END
- Upload the script and preview the interview.
The new text is now displayed at the top of the question:
Why we have included the DefaultLayout.cshtml
We have created a new template that contains two views. These views will replace the ones existing in the Default template when the new template is applied in the ODIN questionnaire using the command *TEMPLATE
We have changed the base main page InterviewTemplate, which means that the change would be visible in all the pages of the interview.
In the first section of the file we can read:
@{
    Layout = "DefaultLayout.cshtml";
}
This is the master page that will be used to render it. This file is searched directly in the template, which is why we had to also include it in the new template.
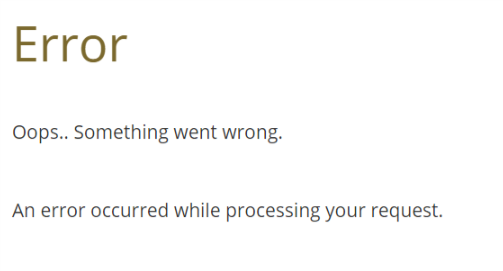
It's important to ensure that any view that is referenced exists, in the new template or in the default one, otherwise the rendering of the interview will fail. If for example, we had changed the body content to:
@section BodyContent
{
    @{ Html.RenderPartial("ThisViewDoesNotExist"); }
    @this.RenderInterviewScreen()
}
Because we don't have that partial view in the new template, and it doesn't exist either in the default one, when starting one interview we would see the error message: